Welcome to my Home Studio

Welcome to my Home Studio
Hard at work, click photo to go to website

Wednesday, September 10, 2008

Espresso Inspiration


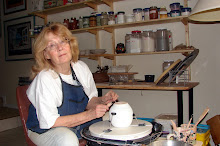
Last month I was contacted by someone that saw my pottery on Etsy. She was looking for someone to make six espresso cups for her to give to her fiancé, Chris Deferio, for his birthday. It seems Chris is famous in the barista world on the east coast and has started his own coffee training school,(thecoffeeinstitute.com) so, you could say that he's really serious about his coffee. She sent me the photo (above) of him that was in the paper in New York during one of his competitions.

He wanted handmade cups without handles height 2 1/2 inches, width 2 1/4 inches with straight sides. She also wanted them by his birthday, which was really pushing the limits on pottery. I said I would like to try and if I couldn't get them done on time, would refund her money.

This photo is of the six completed espresso cups which were finished on time.

She sent me the email below after giving him his gift:

"These are awesome, pat. seriously!!! This is the best money I've spent in a long time. just wanted to let you know that Chris just loved your cups. He couldn't believe how they were just what he's been wanting. We can't wait to use them!Thanks again, and I'll keep you in mind the next time I want some pottery. Blessings to you,
Thanks again for getting them here before his birthday!!!"

After receiving that great feedback, I decided to make some more for sale on Etsy.

The photo of the espresso cups and pitcher are on etsy and if you click on this link you will see more views.

Sunday, September 7, 2008

What Goes Into Making a Mug


Sometimes people will say, can you give me a discount on that mug?

Here is my answer:

1) Drive to C & F Wholesale Ceramics and pick up the clay - 3 hour trip round trip.
2 Unload clay into garage.
3 Weigh out amount needed for the mug.
4 Wedge (knead) clay.
5 Center clay on wheel and throw the mug shape.
6 Remove from wheel and let dry 24 - 48 hours; depending on humidity.
7 Put mug back on wheel and trim.
8 Hand create handle.
9 Let handle dry 1 to 5 hours; depending on humidity.
10 Attach handle to trimmed mug.
11 Cover handle in hot wax to slow drying on very dry days.
12 Let mug dry 1 week minimum. If mug cracks at this point, re-cycle clay and start over at step 3.
13 Place mug in kiln and fire to 1850 F - about 18-20 hours.
14 Unload mug from the kiln. If mug has cracked during first firing, discard, write-off and start over at step 1.
15 Mix glaze(s). Each glaze requires approximately 3 hours to mix and sieve.
16 Put hot wax on the bottom of mug so it will not stick to kiln shelf.
17 Choose design and glaze mug. This can take anywhere from several minutes to upwards of an hour, depending on the design.
18 Let mug dry thoroughly.
19 Load glazed mug back into kiln. If glaze scratches or gets bumped, wash with hot water and start back at step 13.
20 Fire glazed mug to 2250 F. This takes 14-16 hours depending on electricity demands.
21 Hold at 2250 F for approximately 20 minutes. Make sure all shelves reach the exact same temperature.
22 Wait approximately 14 hours for kiln to cool to under 350F before opening.
23 Remove and check mug. If cracked, discard, write-off and start over at step 1.
24 If mug has miraculously survived to this point, clean sharp bits off bottom with grinding stone by hand, and put out for sale.
25 Last, but certainly not least instruction; try not to attack the foolish person who innocently asks "Why does this mug cost so much?"
AND, let us not forget all the hidden steps NOT numbered in here.
* Answer phone
* Sell pots
* Pay FPL (electric)
* Develop new glazes and slips
* Create new designs
* Pay FPL
* Re-cycle clay
* Clean studio, tools and wheel
* Pay FPL
* Not to mention the time, effort, gas and other expenses involved in getting into a show in the first place, and then traveling to it, setting up, selling all day, braking down, driving home, unpacking... I guess that's a list all by itself...
Thank you for your time and attention. - Patspottery

Friday, September 5, 2008

Pet Urns


I recently sold two urns on my Etsy shop. I was very surprised and thrilled to get these two different emails below from the buyers. To think that my urns have meant that much to people that they would place their beloved pets in them, means so much to me.


This is perfect to hold the ashes of a cat of mine that just passed. Beautiful work. tagscats (this is a link to tagscats etsy shop where she has wonderful cat artwork)


We recently lost our lovely dog, Tahlula. We searched and searched for the proper way to respect her remains and were at quite a loss until we found your urn. The subtle grass pattern on the urn was a perfect match to our favorite photo of Tahlula. We cannot thank you enough for sharing your talents with us. kellydeen (above is a photo of Tahlula which kellydeen was kind enough to send me)


I hope I can continue to make a difference in the lives of my customers. They are the best!!!